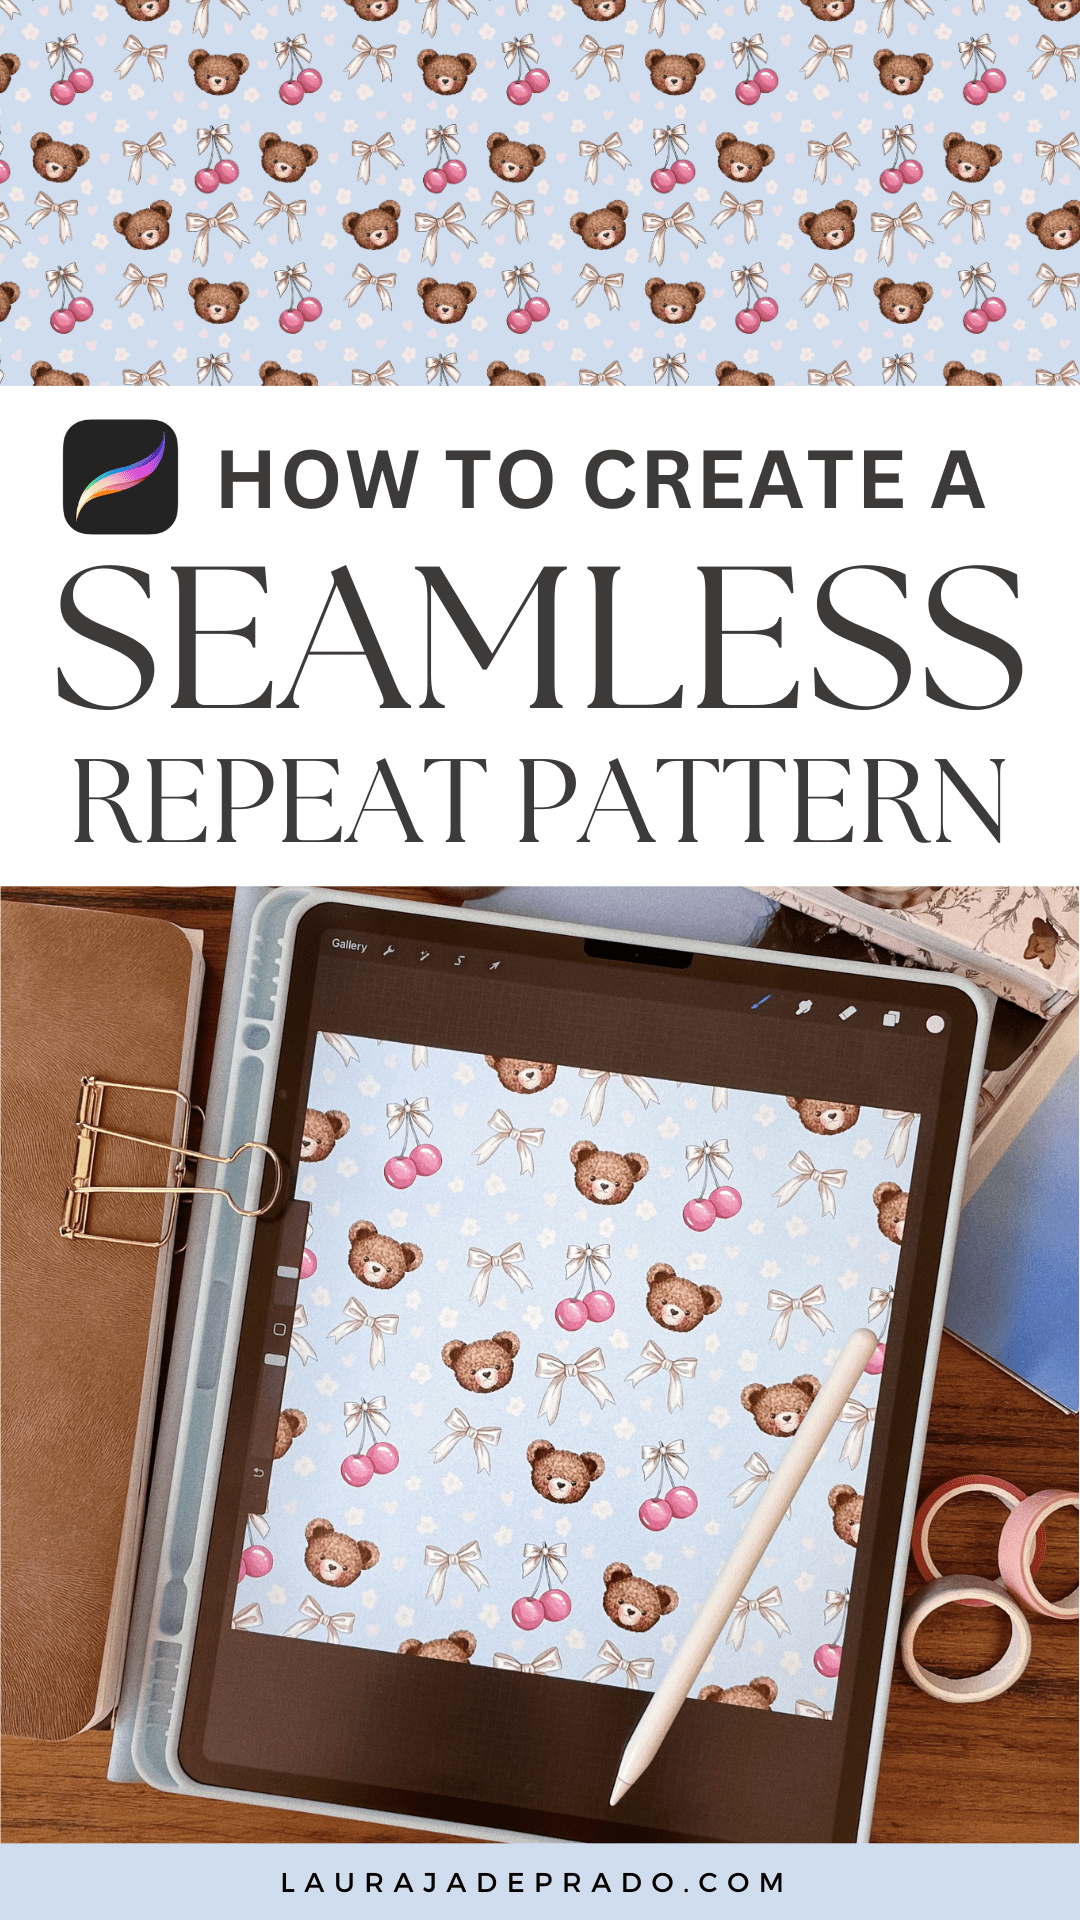
In this post, I’ll be sharing a tutorial on how to create a seamless pattern using my simplified method and just one design software program.
Disclaimer: This post may contain affiliate links. If you make a purchase through a link, I may receive a commission at no extra cost to you.

Today’s post is a step-by-step tutorial for creating a seamless pattern. While there are various approaches to this, I’ll be sharing the process that I’ve used over the past several years throughout my career as an independent artist.
I design all of my seamless patterns on the Procreate app using the iPad Pro 12.9 inch and an Apple pencil. To enhance the paper-like sensation while drawing, I use a matte screen protector on my tablet, which improves the tactile experience.
Let’s dive in!
Table Of Contents:
What are seamless patterns?
How to design a seamless pattern in Procreate app
What to create with your finished seamless pattern
What are seamless patterns?
A seamless pattern (often also referred to as a repeat pattern) is a small segment or unit of elements that can be tiled and replicated endlessly to form a pattern with no visible breaks or seams at any size. Regardless of how many times the original design tile is duplicated, the elements will align perfectly on all 4 sides, extending infinitely.

Seamless patterns are widely used on various surfaces – most notably on fabrics for fashion and homeware items. But they are also used on other common goods like product packaging, wrapping paper, stationery, and more.

How to design a seamless pattern in Procreate app
For this tutorial, I’m using a few digital stickers from my Bears and Bows bundle paired with some simple flower doodles. If you’d like to follow along with the exact tutorial, you can pick up the artwork here, and copy the color palette hex code numbers below to use the same color palette.

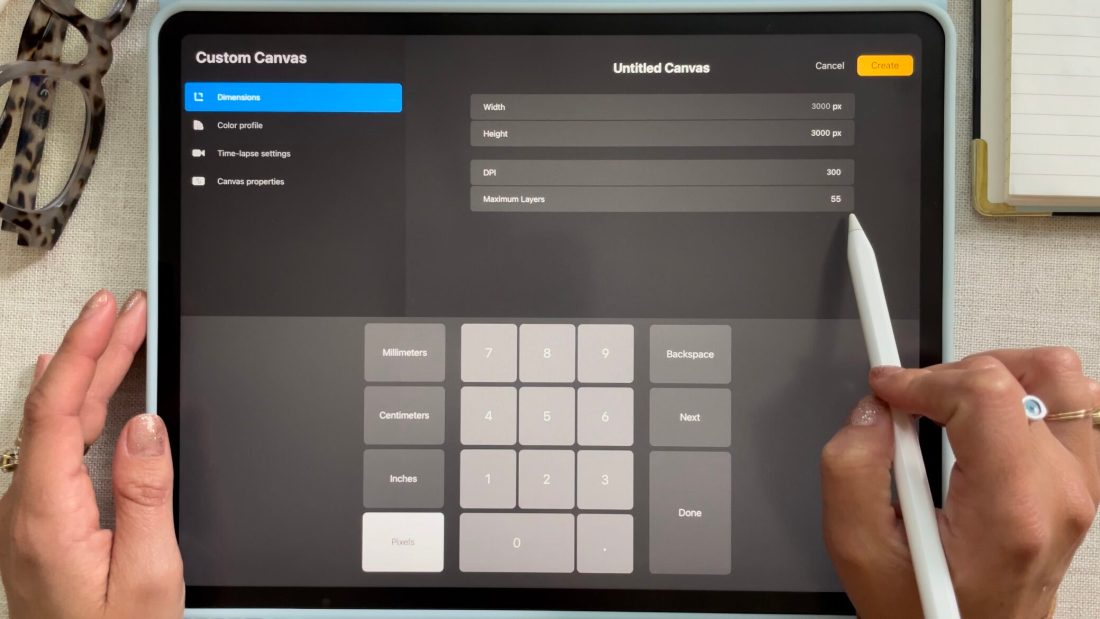
Create a new canvas in Procreate measuring 3000×3000 px with a resolution of 300 dpi.
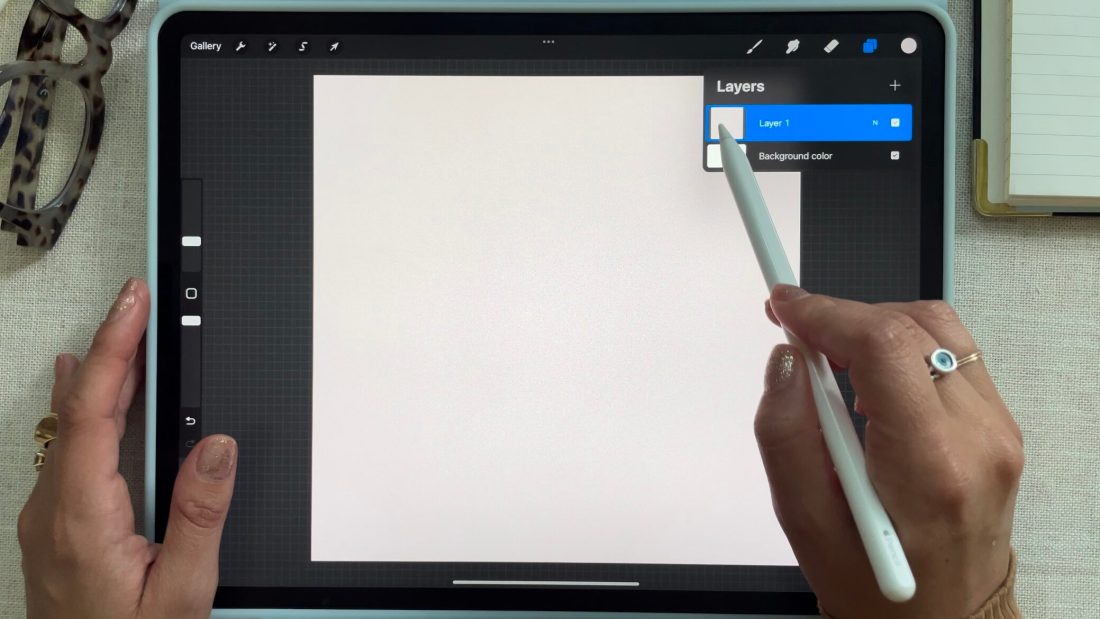
On a new layer, fill it with your background color of choice.
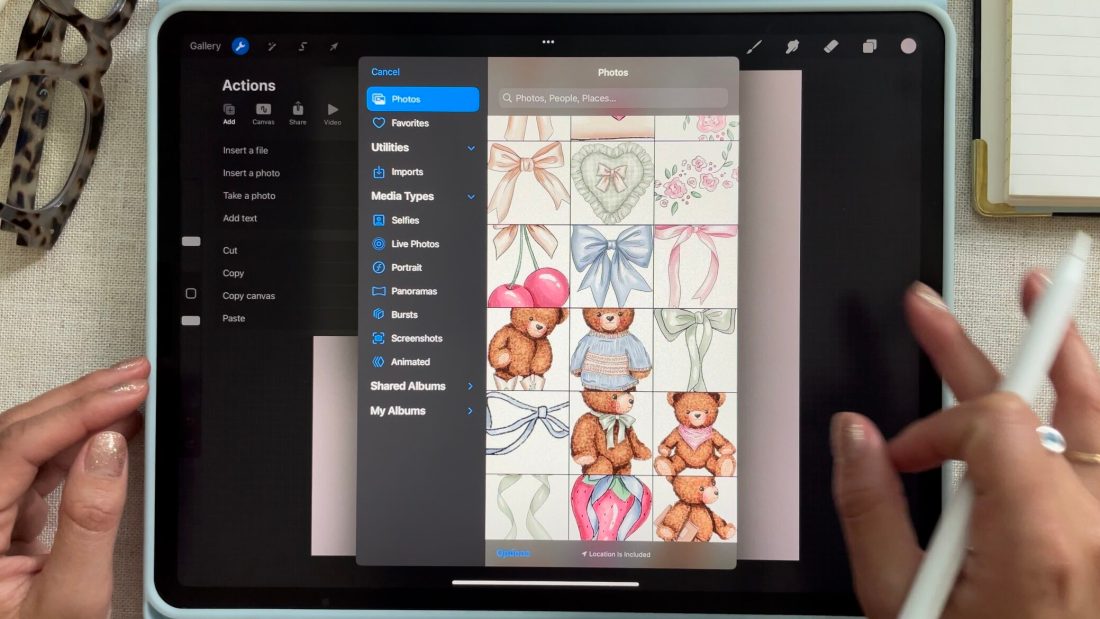
Import the digital stickers (clip art) or draw your own elements on separate layers. To import digital stickers, first make sure they are saved to your iPad camera roll. Then tap the wrench icon and select import photo.
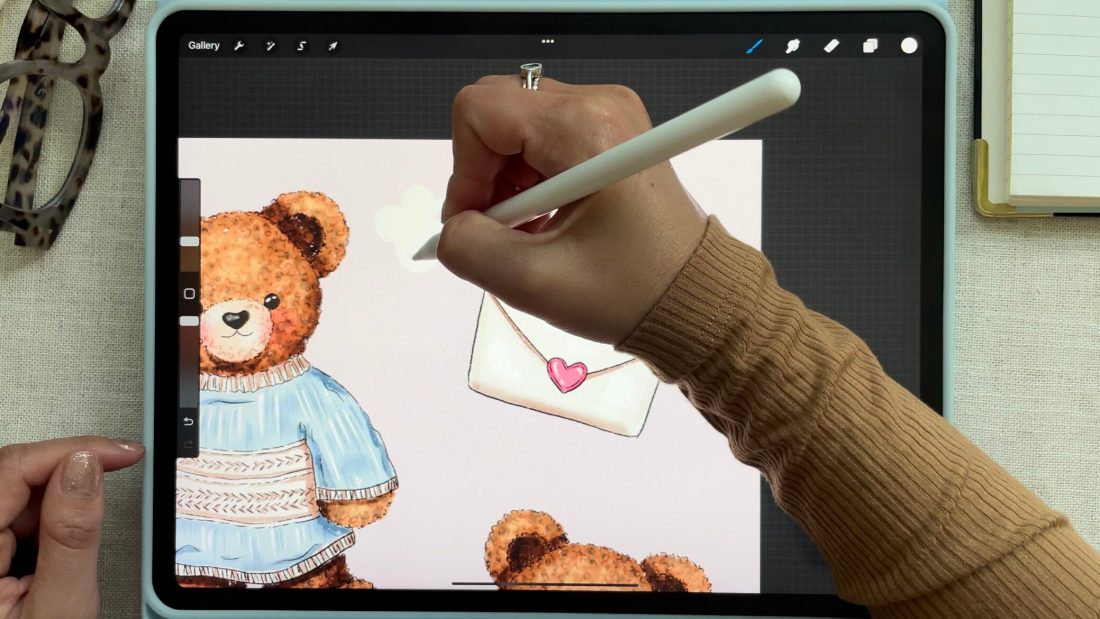
Start placing the elements on the canvas, making sure none of the elements are touching the edges of the canvas.
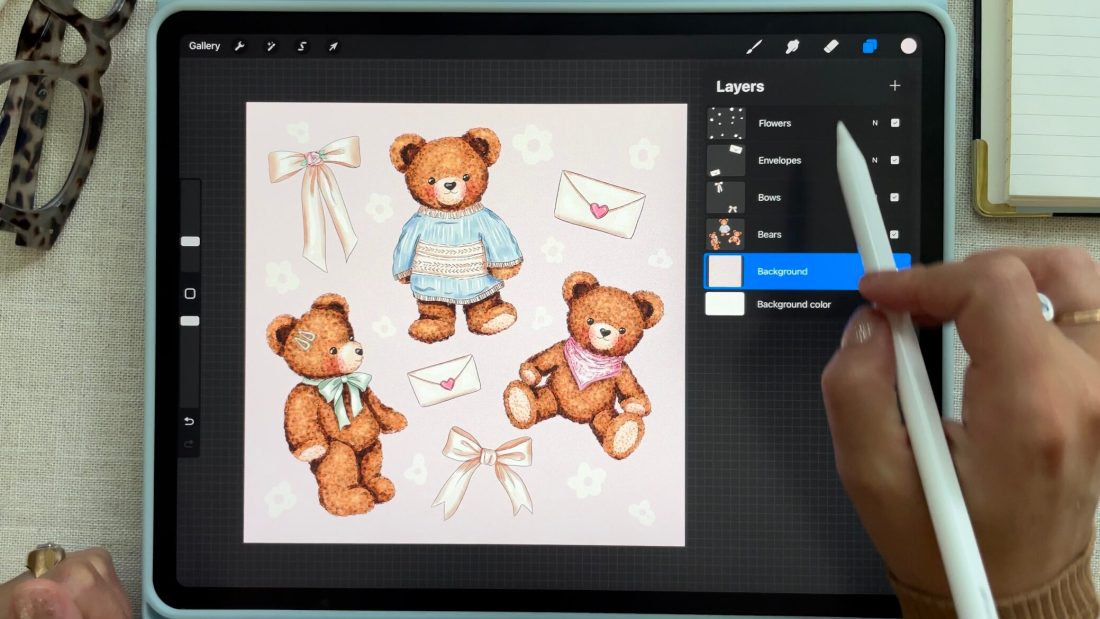
If you are using several different elements, group them together so that they are each on their own layer (ie: all the bears on one layer, all the bows on one layer, etc. ) To quickly combine layers in Procreate, simply pinch them together in the layers panel to merge them. Then rename your layers accordingly to stay organized.
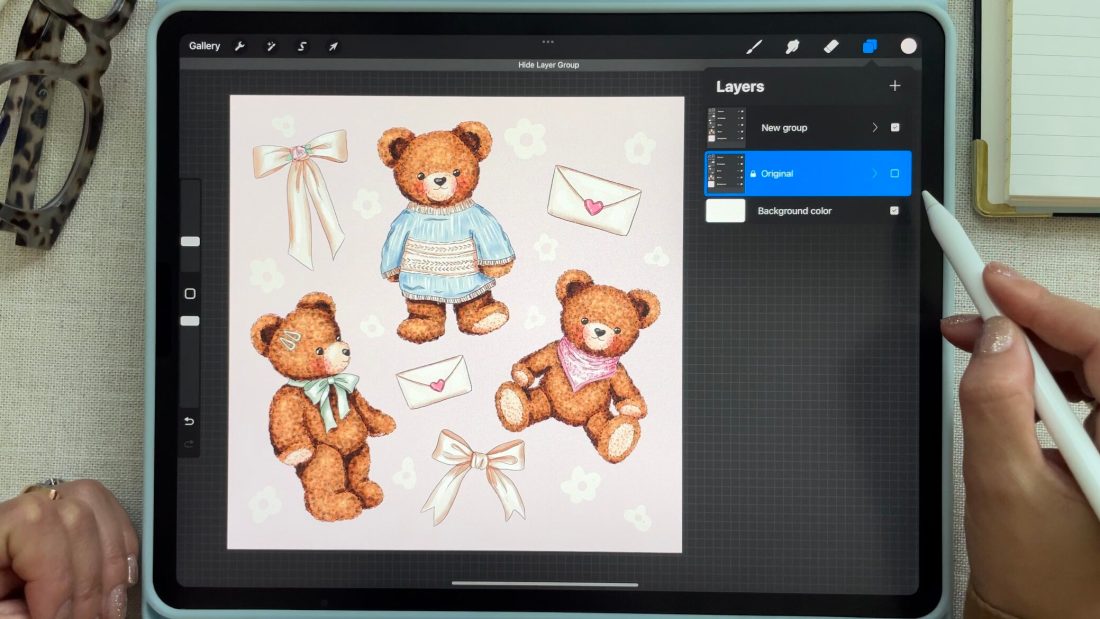
Group all layers together by swiping right on all of the layers and tapping “group”
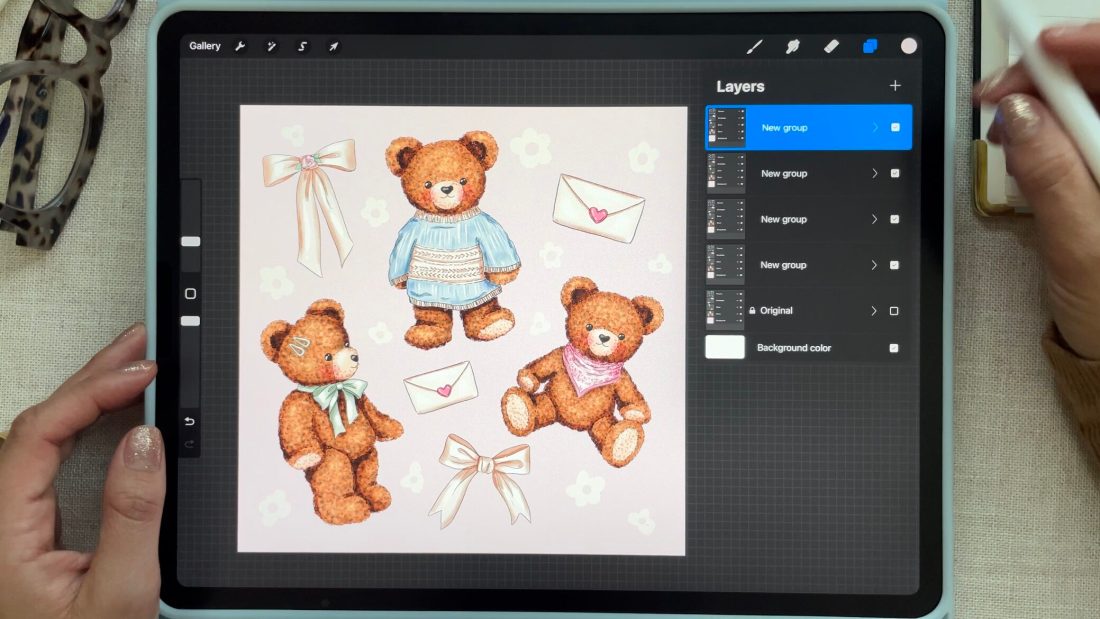
Duplicate the group 4 times to create 5 copies. To duplicate the group, swipe left on the group and tap “duplicate.” Rename the group on the very bottom to “original” or “backup” then swipe left to lock the group and uncheck the box to hide it. This group serves as a safety net with the original artwork just in case we need to access it later on.
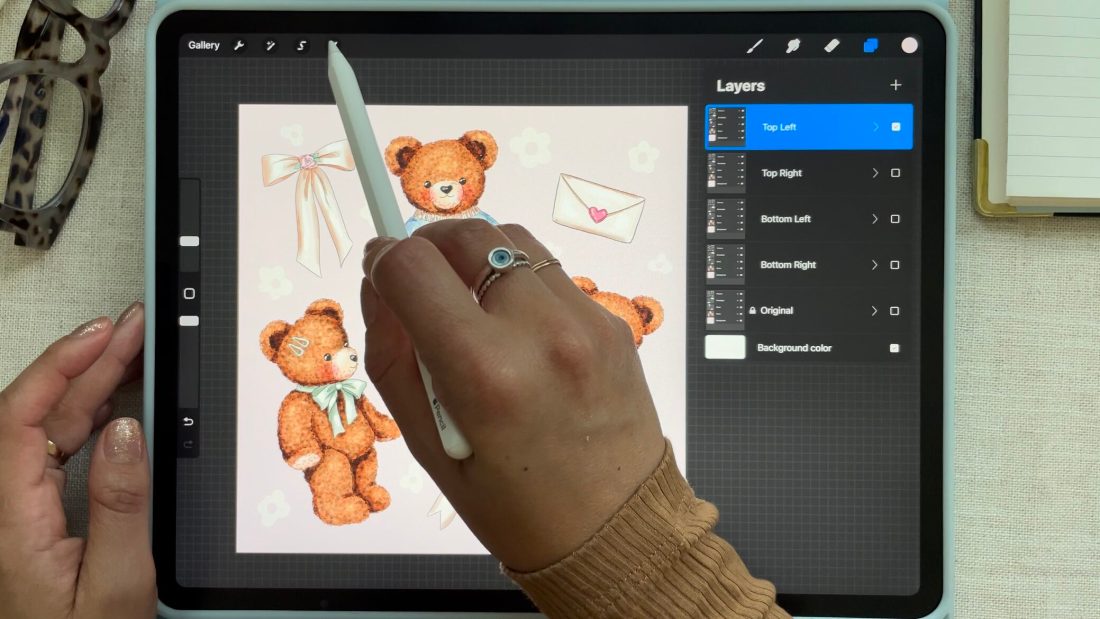
Rename the groups in order from top to bottom as follows: top left, top right, bottom left, bottom right.
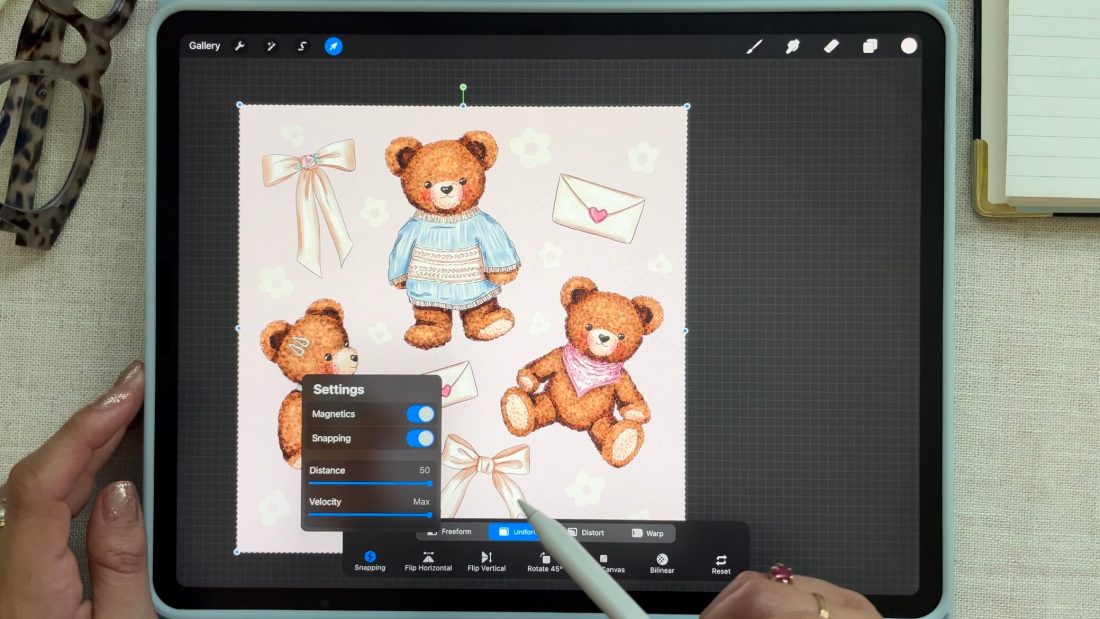
Select the arrow (transform) tool and under the “Snapping” tab make sure the Magnetics and Snapping settings are toggled on. Then set the Distance to 50 and Velocity to max.
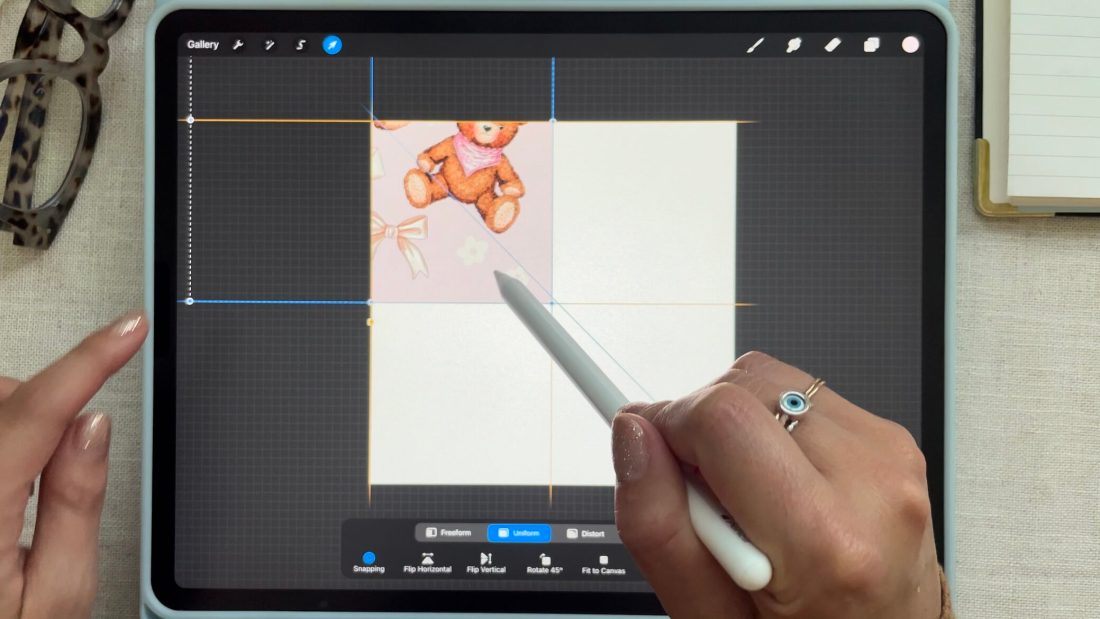
Hide all groups except the first one which should now be named “top left”. Move the entire “top left” group over to the top left quadrant of the canvas until you see the orange lines, it should snap in place. Make sure it’s perfectly aligned before moving forward because if it’s off by even 1 pixel it will create a seam and ruin the final pattern design.
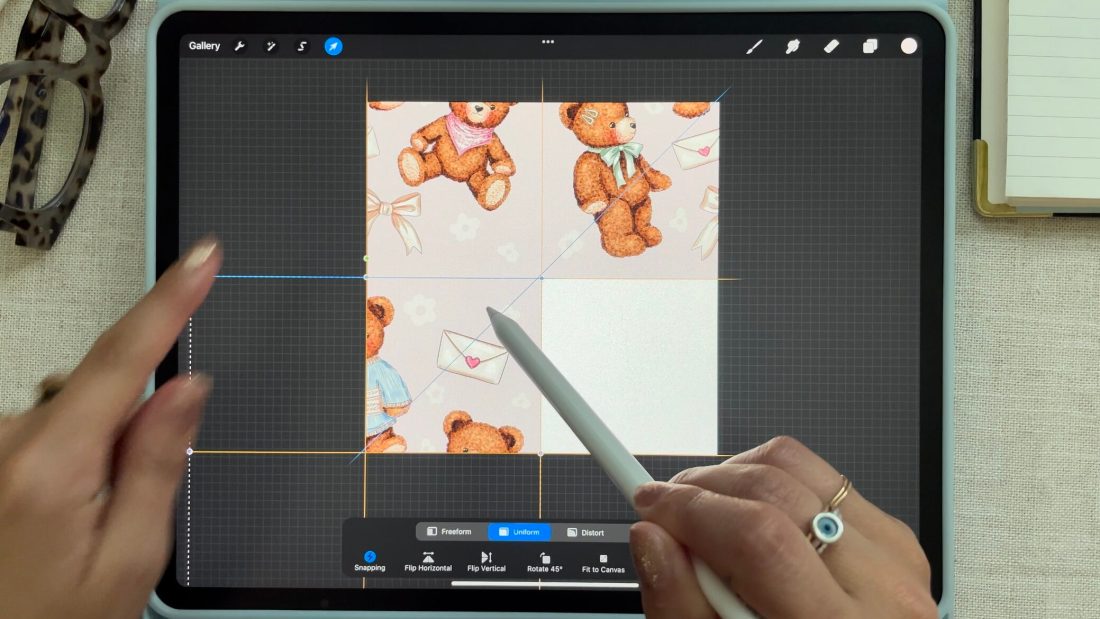
Repeat this step with the other groups, snapping them into each of the other quadrants of the canvas.
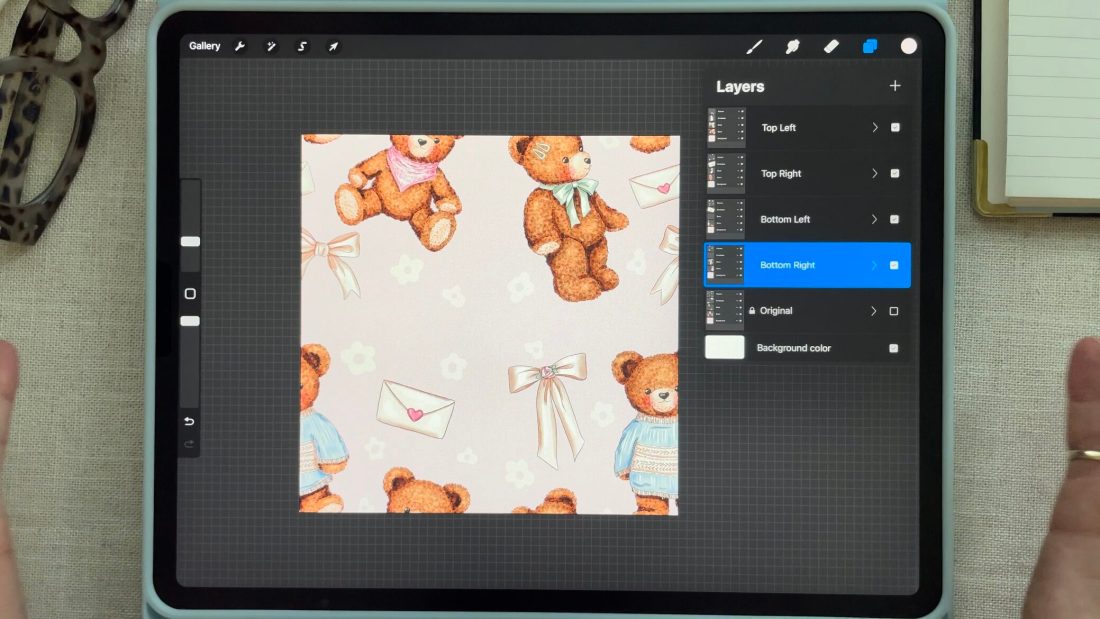
You now have a repeat pattern! However, you may notice there are areas on the canvas that look a bit empty or the spacing is off. You can continue to tweak the design, adding elements to the canvas as long as they do not touch the edges.
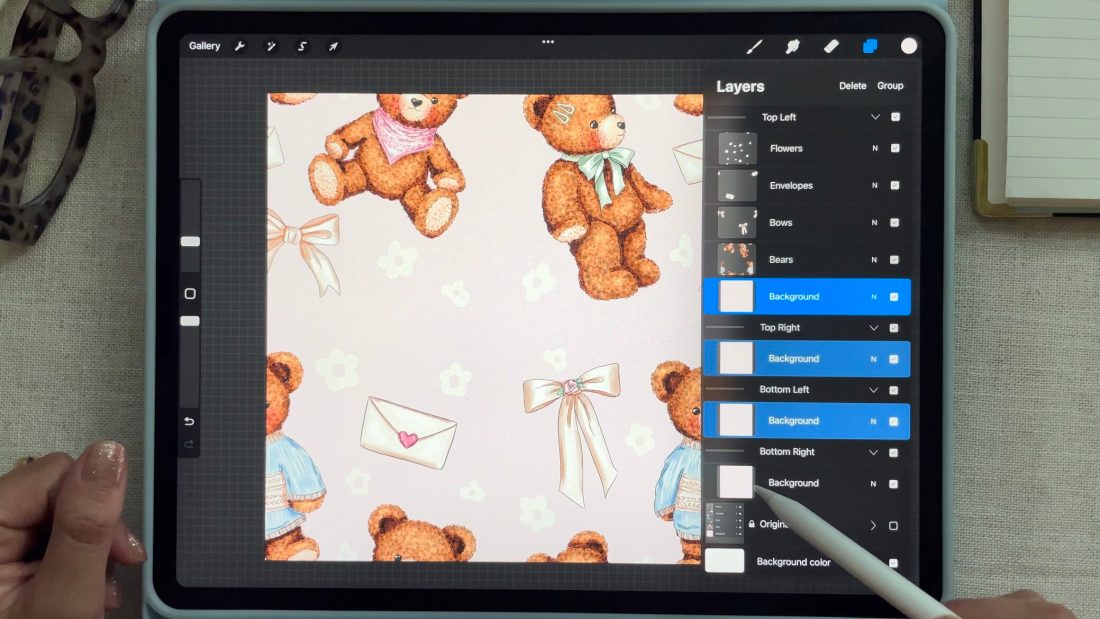
Before doing so, organize your layers by grouping the same elements so that they are no longer scattered throughout the different groups. To quickly combine layers, swipe right on each layer you want to merge, and then tap “group” on the top right of the layers panel, then tap the new group and select flatten.
Once all your elements are together in a new group, you can delete any empty groups that you may have left over, and rename the layers once again to stay organized.
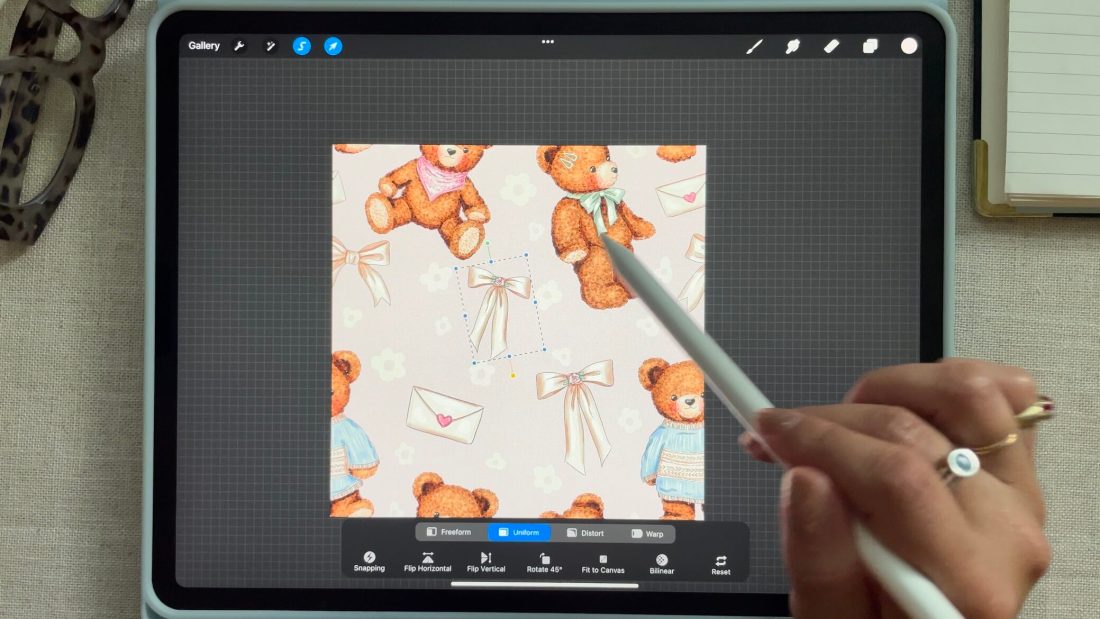
Now you can continue editing the design. Use the selection tool to copy and paste elements, add new clip art, draw your own elements, etc. Just make sure you are not moving or changing any of the elements that are touching the edges of the canvas as these are the parts that will make the final pattern seamless.
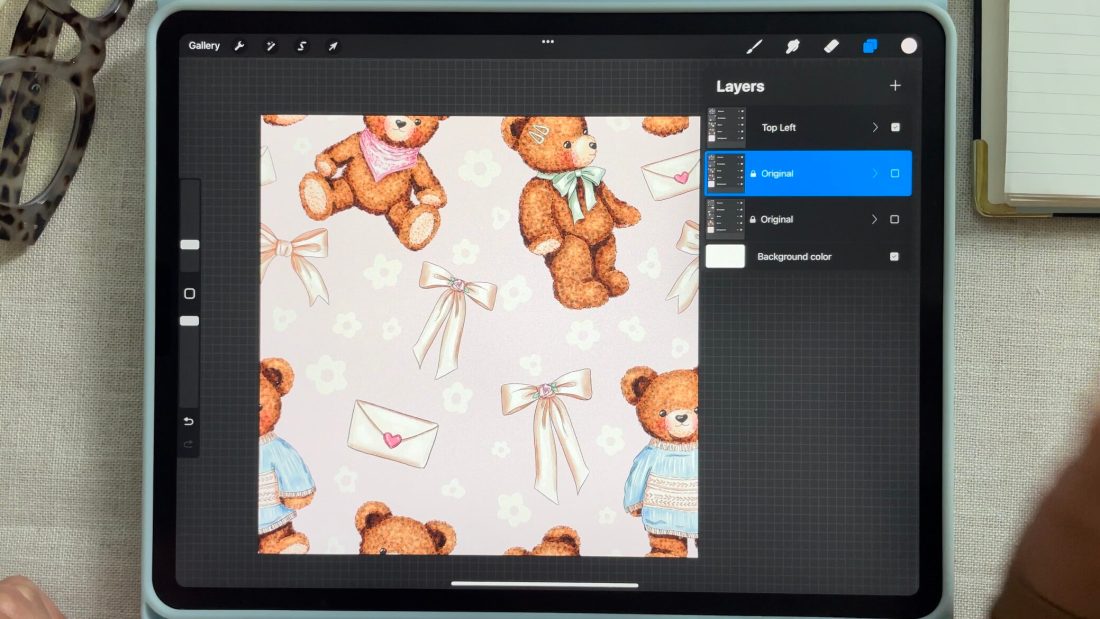
Now it’s time to test or preview the pattern on a smaller scale to make sure it’s completely seamless. Once again, duplicate the new group to create 5 copies, and lock and hide the bottom one just to keep for safety, like we did with the first group of original designs.
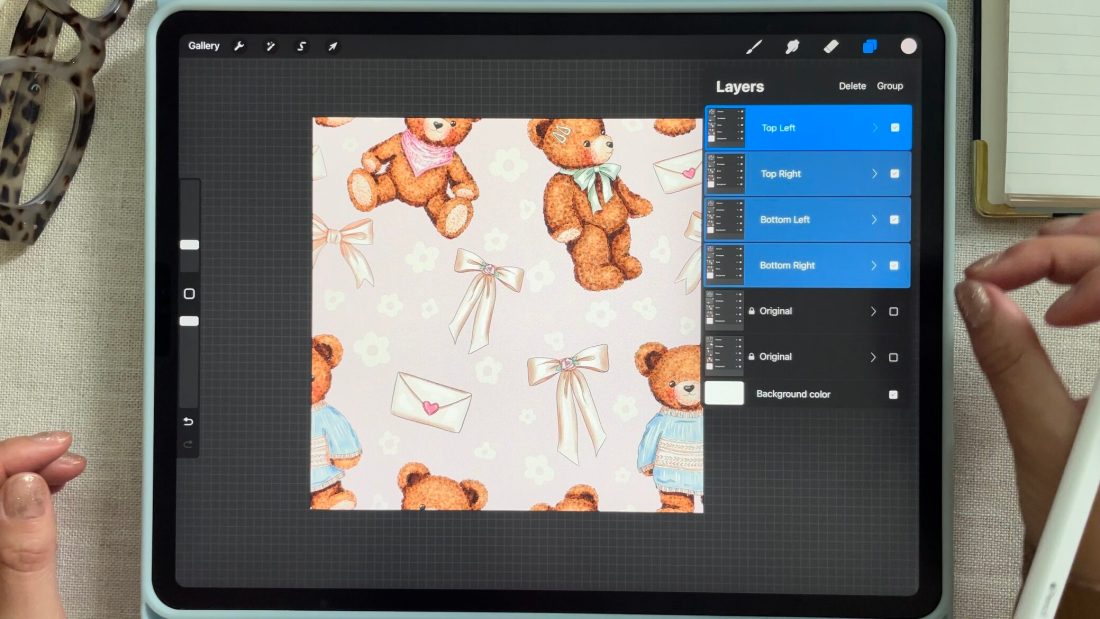
Rename the groups again in order from top to bottom as follows: top left, top right, bottom left, bottom right.
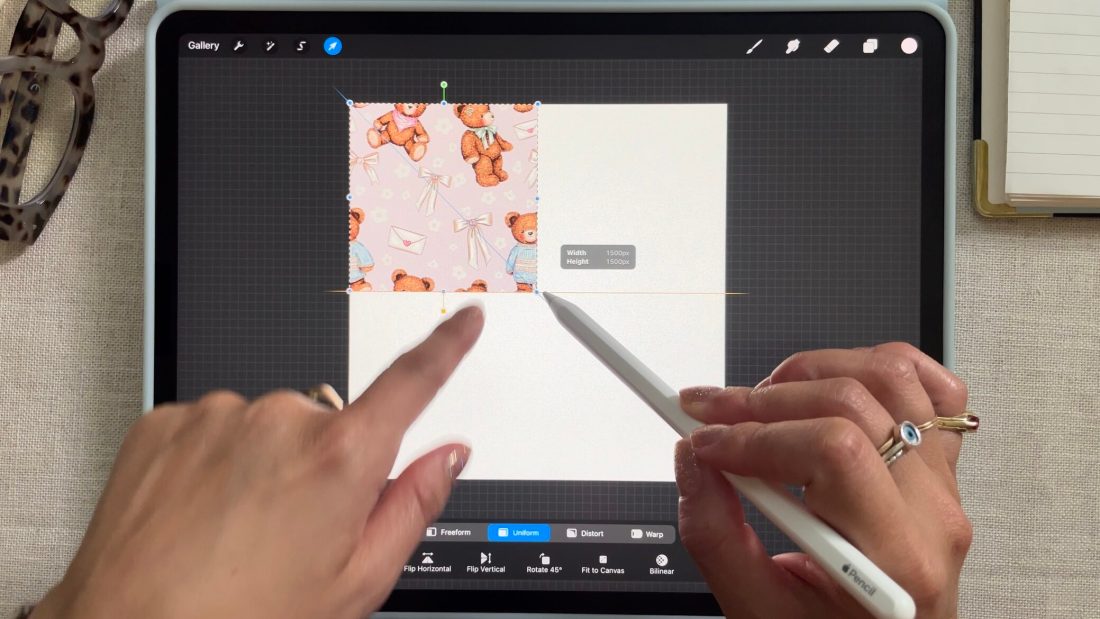
Under the arrow tool, make sure Magnetics and Snapping are still toggled on. Then select the 4 groups and select the arrow tool. Resize all 4 groups to fit in the top left quadrant – making sure it snaps perfectly in place using the orange lines as a guide once again.
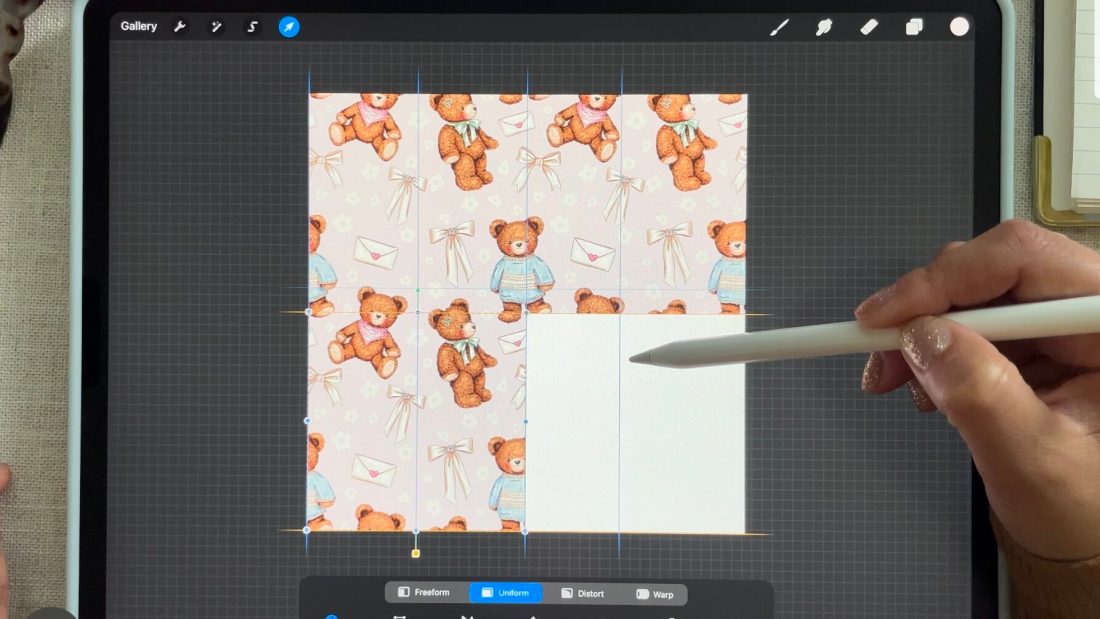
Then select one group at a time, and move it over to each of the remaining quadrants. They should also snap perfectly in place. Zoom in to make sure everything lines up perfectly and there are no seams or gaps between the quadrants.
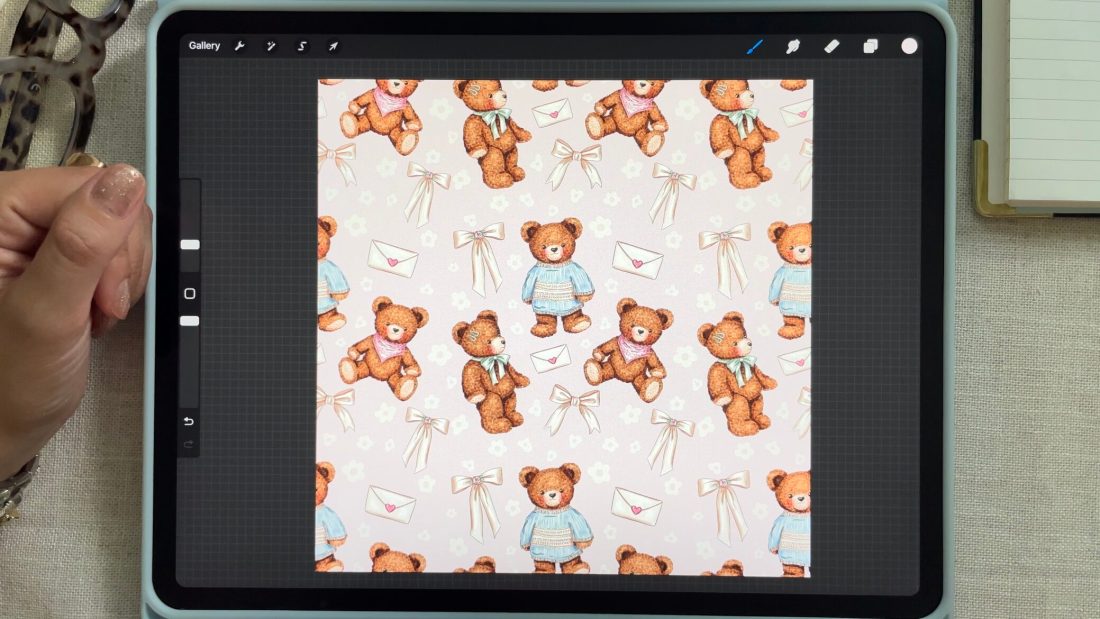
If everything looks nice and seamless, you’re done!
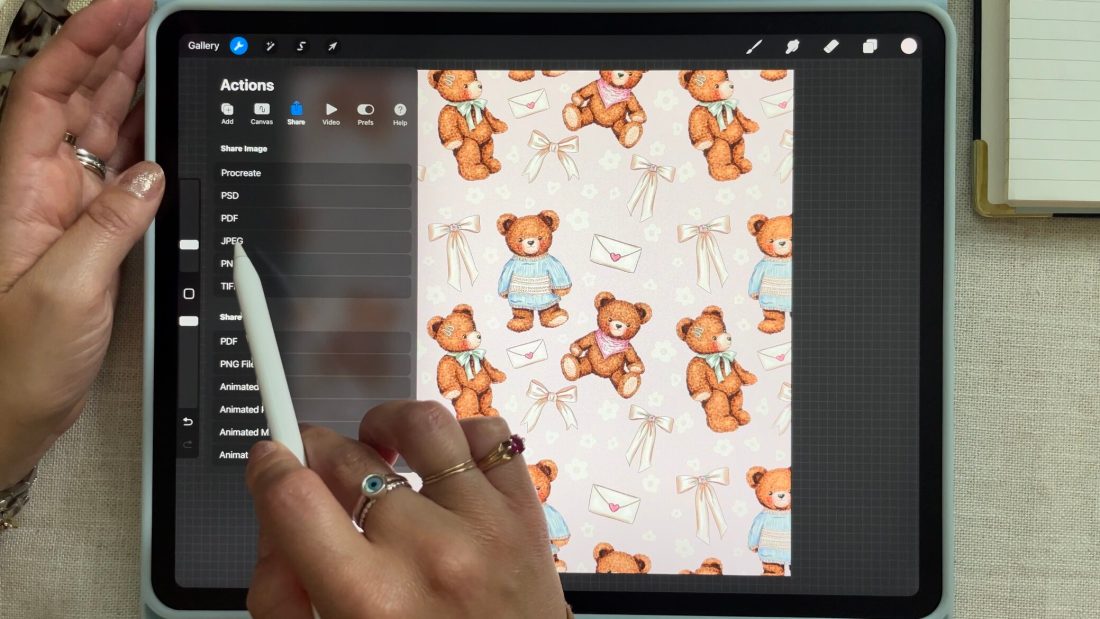
You can now export the pattern by tapping the wrench icon, and under share, select JPEG, then save the image to your camera roll.
What to create with a seamless pattern?
There are numerous applications for seamless patterns, especially for artists who own the copyright. Here are some ways you can utilize seamless patterns creatively:
- Create and sell digital products on marketplaces like Etsy, Creative Fabrica, or Creative Market by designing multiple patterns and offering them as a bundle download – like the ones listed in my shop here.
- Upload the patterns to a platform like Spoonflower to produce custom fabric or wallpaper.
- Design digital wallpapers (or backgrounds) for tech devices using tools like Canva or Photoshop.
- Make use of the patterns for print-on-demand products such as mugs, towels, or items with all-over prints.
- Sell products on platforms like Society 6, which offers a wide range of homeware categories including duvet covers, shower curtains, tablecloths, wallpaper, and more.
Note: if you are using clip art or elements from another artist in a seamless pattern design that you intend to sell, you must make sure you’re complying with the original artist’s legal terms and conditions and commercial use policies.
Designing a seamless pattern may seem daunting at first, but by following these step-by-step instructions, you can easily create your own unique and professional-looking patterns that can be used in a variety of ways, from digital products to home decor and more. So grab your iPad and let your imagination run wild, because the possibilities are endless.
If you’re inspired to start your own passive income business and are interested in launching an Etsy shop, click here to join and create your first 40 listings for free.
Looking for more inspo!? Check out my Pinterest for tons of lifestyle and design content… updated daily!
This post was all about how to create a seamless pattern. If you like this content, check out these posts below!
– My Favorite Procreate Brushes | For digital art + illustration
– How To Design and Sell Digital Stickers – The Complete Process
– How to design a Creative Digital Collage
Xx- Laura
PS – Follow along on Instagram for more posts and stories related to this topic!
PIN THIS FOR LATER
